This is officially my first blog post about a cupcake that was made AFTER I decided to start a blog, which doesn't really mean anything to you except MORE PICTURES (which Ian makes fun of...but I don't know anyone who would want to read a blog about baking and wouldn't want to see pictures. Do you???).
So, I found the recipe for Caramel Apple Cupcake with Vanilla Bean Frosting on the Cupcake Wars website during my first scan through their recipes and I was very excited to try them. In my excitemed state I wanted to share my new recipe finds, so I sent links to the three cupcake recipes I really wanted to try to Megan (one of my best friends who is from Kansas, but now works in Iowa). She looked at the recipes and said that they looked interesting, but that she wasn't really interested in eating any of them because she doesn't really care for sweets. Well, she wasn't interested in eating any of them except the caramel apple cupcake.
Megan came to visit me (and her family) a couple of weeks later, and I decided that between work and our dinner reservations, I would make these cupcakes so she could try one!
The cupcakes themselves were very simple to make; however, there were a few interesting aspects. First, the recipe calls for four apples, peeled, cored, and cut. I don't really like using knives (I'm fairly certain I am going to cut off my finger...and my skittishness while using them probably makes that more likely...which makes me more skittish...and around and around we go). So, to peel the apples, I used a potato peeler, which worked rather nicely.

Next, it was time to cut the apples. Many of the people who commented on the original recipe suggested that shredding the apples worked better in the recipe. Again, I don't like knives, so anything that keeps a knife out of my hand is a good option. However, I've also never shredded fruit...so I was very uncertain how that would work. Turns out, it works rather well!


Yummy, right?
I also had the opportunity to use some fun ingredients in this recipe. First, I have a sister-in-law, Amanda, who is very crafty. On one of my last trips home, Amanda told me that she had made her own vanilla extract! I was thoroughly impressed, and she gave me some to take home with me! This isn't a very good picture...but here it is!

You can't see them in this picture, but there are actually vanilla beans in that jar. Apparently all you do is put vanilla beans in a jar and cover them with alcohol (vodka or bourbon will work) and then let everything sit for a while! I LOVE my vanilla!
The second fun ingredient is also vanilla. This vanilla is vanilla bean paste, and it was in the frosting. I purchased mine at William Sonoma. The difference between the vanilla bean paste and the vanilla extract is that in vanilla bean paste, vanilla beans are actually chopped up in the paste. Vanilla bean paste is much thicker than vanilla extract, but it is still a liquid. Apparently you can substitute it anytime your recipe calls for vanilla extract. Here is a picture of the bottle that I purchased...and here is a picture of what the actual paste looks like (along with a better description of what it is and how/when to use it!).

The last fun part of the caramel apple cupcakes baking experiment was finding new baking cups and trying them out. Obviously, for the past couple of weeks (a month, maybe?), I have been baking lots of cupcakes. One thing that always drives me crazy about cupcakes are the little cupcake liners. First off, I'm cheap and I don't really want to buy expensive liners. However, the cheap liners are...well...cheap. They are very thin, they pull away from the cake, and they leave the cupcakes looking like crap. However, when I was at William Sonoma purchasing my vanilla bean paste, I found what I hoped would fix my issue with cupcake liners: SILI-CUPS!

Sili-cups are silicone cupcake liners (baking cups) that are completely reusable. Being a cheap person, this was one of those purchases that I justified by saying I would spend a little more now (about $25) to make the initial purchase, but I will use them so much that I will make up for it in the future! Whether my justification pans out remains to be seen. I purchased the sili-cups and tested them out with this recipe by lining one cupcake pan with normal paper liners, and a second cupcake pan with the sili-cups (notice how colorful the sili-cups are! I love them!).

In the end, I decided that I like the sili-cups better than regular cupcake liners (which is good...because I couldn't have returned them)! Once the cupcakes are cool, you can just pop them out of the liners before decorating them (I had an irrational fear that the cupcakes would lose their cupcake form if I removed them from their liner...which is NOT true!). They wash up really easily and are dishwasher safe. They were a great purchase!
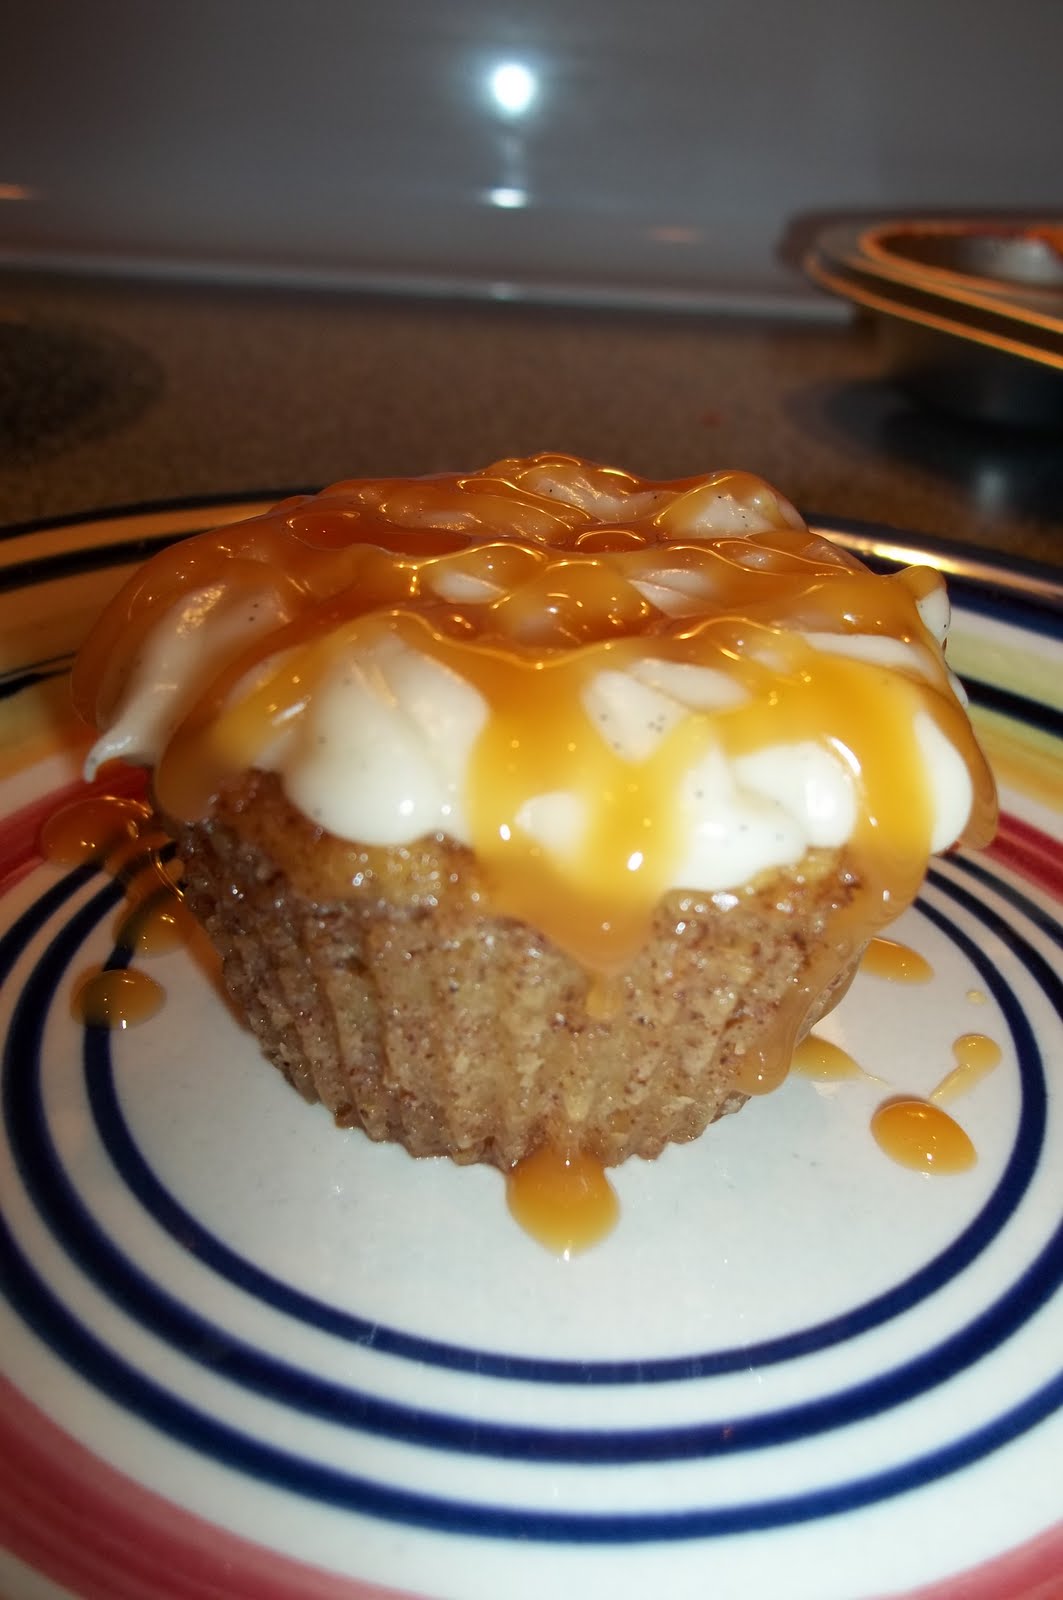
At the end of the day, I learned a couple of important baking lessons with this recipe. First, don't frost cupcakes while they are still hot (or warm). I had a little frosting melting problem. This didn't effect the excellent taste of my cupcakes, but it did make them look a little bad. Woops!
Second - don't soak cupcake pans. They rust!
I did finish my cupcakes in time to share them with Megan and her family (but the need to finish early contributed to the frosting fiasco!), and I can safely say that everyone who ate one of these cupcakes LOVED them. So far, these have been my personal favorite!
Caramel Apple Cupcakes
2 cups granulated sugar
2 large eggs
1/2 cup unsalted butter, melted
2 teaspoons ground cinnamon
1 teaspoon baking soda
1 teaspoon baking powder
1 teaspoon salt
4 apples, cored, peeled, and chopped (recommended: 2 Granny Smith and 2 Fuji) (I shredded the apples)
Caramel Syrup (garnish)
- Preheat the oven to 350 degrees F. Line two regular size cupcake pans with cupcake liners.
- In a large bowl using an electric mixer on low speed, combine the sugar, eggs, butter, and vanilla extract until blended. In a separate large bowl, combine the flour, cinnamon, baking soda, baking powder, and salt. Add the flour mixture to the butter mixture, mixing on low until blended. Stir in the apples.
- Fill the cupcake liners 3/4 full with batter and bake until the cupcakes spring back when touched with your finger (15 to 20 minutes). Let cool in the pan for a few minutes and then remove to a wire rack to cool completely (the cooling is important...)
Vanilla Bean Cream Cheese Frosting
1 cup unsalted butter, room temperature
1 8-oz bar cream cheese, room temperature
1 tablespoon vanilla bean paste
4 cups powdered sugar
1/2 teaspoon salt
- In a large bowl using an electric mixer on low speed, beat the butter, cream cheese, and vanilla bean paste until smooth and thoroughly blended.
- Slowly add the powdered sugar and salt.
- Mix until smooth.
- (try not to eat all of the frosting!)
- Pipe or spread the frosting onto your COOLED cupcakes and then garnish with Caramel Syrup!
YUMMY, YUMMY, YUMMY! These sound absolutely amazing. I especially enjoyed your comments on the silicone cupcake pan because I've always wondered if they could really withstand the temperatures from the oven.
ReplyDeleteEm