Friday, September 30, 2011

Pina Colada Cupcakes

I was going to say something here about how I was on a roll, posting twice in a period of two days...that was when I started to write this blog just a day after my last post.  Obviously, that is no longer true...no roll here!  But, a new post today so YAY! 
Ok, so Pina Colada cupcakes came from, you guessed it, the Cupcake Project! 

I LOVE these cupcakes!  They were really moist and delicious!  I did, however, run into many, many, MANY issues in the baking process (aka - I learned a lot of important baking lessons!).

First, I learned that it is easier to put a lid ON a can of vanilla than it is to take a lid OFF...or I was apparently stronger when I made the margarita cupcakes than when I made the Pina Colada cupcakes...because I couldn't get the lid off the vanilla.  No worries though!  I used vanilla bean paste instead and everything worked out fine.  I'm not really sure what lesson I learned from this experience.  Grow bigger muscles?  Don't put the lid on the vanilla all the way (once I finally get the lid back off, that is)?  Who knows...

The second issue I had was with my silicups...you see, with my first 12 cupcakes, about 5 came out of their cups just fine.  The other 7, however, were stuck.  One of two things happened here.  Either I (1) did not spray the silicups with Pam, or (2) these cupcakes were just stickier than other cupcakes I have made.  I'm guessing that it was my failure to spray them.  Either way, I switched to paper liners with the remainder of the cupcakes.

The third lesson I learned was to pay attention when purchasing ingredients.  This recipe calls for pineapple juice.  So, I went to the store, found pineapple juice, purchased it, and then used it to make my cupcakes.  After the cupcakes were done, I decided to make myself a drink.  Since I had purchased both Malibu rum and pineapple juice just for this baking experience, that's what I made myself.  It was at that moment that I first actually looked at the tiny cans of pineapple juice I bought and realized that they were really pineapple orange juice.  Oh well!  No one noticed!

The fourth, and probably most important lesson, I learned with these cupcakes is THERE IS A REASON RECIPES SAY TO USE ROOM TEMPERATURE BUTTER AND CREAM CHEESE IN THE FROSTING.  I just assumed that my Kitchen Aid was good enough at its job that I could pull the cream cheese and butter out of the refrigerator and use them chilled, and, for the most part, my frostings have always been fine (even if a little lumpy).  This time, however, I actually used room temperature butter and cream cheese and THE FROSTING WAS ACTUALLY SMOOTH.  It was amazing!  So...use room temperature ingredients if the recipe calls for it!  Seriously!  It makes a difference!
Finally, I learned that sometimes you just don't need to double the recipe!  This recipe should make 18 cupcakes...I doubled it thinking I would have 36...I actually had 40.  When you are baking for no one in particular and no special occasion, 40 cupcakes is definitely too many.  Luckily, I work with PLENTY of people who are ready, willing, and able to assist me by eating them!

These cupcakes turned out very well, but I believe the Margarita Cupcakes remain the crowd favorite!


Pina Colada Cupcakes
1/3 Cup Malibu Rum (or any other rum you want to use)
3/4 Cup coconut milk
1/4 Cup pineapple juice (or, you know, pineapple orange juice works too)
1 teaspoon vanilla (or vanilla bean paste)
1 1/2 cup all-purpose flour
1 teaspoon salt
1 teaspoon baking soda
1/2 Cup unsalted butter, room temperature
1 Cup + 3 tablespoons sugar
3 large eggs
1 Cup shredded baker's coconut
1 Cup crushed pineapple
  1. Preheat oven to 350 F.
  2. In a small bowl, combine rum, coconut milk, pineapple juice, and vanilla.  Set aside.
  3. In a medium bowl, whisk together the flour, baking soda, and salt.  Set aside.
  4. In a large mixing bowl, beat butter and sugar until light and fluffy.
  5. Add eggs to the sugar mixture one at a time, beating well after each addition.
  6. Alternatively add the flour mixture and the rum mixture, beating well after each addition.
  7. Fold in the coconut and pineapple (I'm not sure what fold means...so I just mixed in the coconut and pineapple, and all turned out well).
  8. Fill cupcake liners 3/4 full.
  9. Bake for 25 minutes or until cupcakes bounce back when lightly touched or a toothpick comes out clean.
Coconut Cream Cheese Frosting
8 oz cream cheese, ROOM TEMPERATURE
1/4 Cup unsalted butter, ROOM TEMPERATURE
2 Cups powdered sugar
3 Tablespoons coconut cream
  1. Mix cream cheese and butter until light and fluffy.
  2. Mix in powdered sugar a little bit at a time.
  3. Mix in coconut cream.
  4. Pipe onto cupcakes.
  5. Mix shredded baker's coconut with your favorite color food coloring (I used pink) and then top your cupcakes! 

Sunday, September 18, 2011

Margarita Cupcakes and My First Solo Jury Trial (kinda)


Hello to you, the people who read this blog!  So, it has been FOREVER since my last blog post.  As you would expect, I have a perfectly good excuse for my lack of blogging - I was simply too busy!

In the last two months, my work life has exploded!  I have been staying late and working weekends all to prepare for my FIRST SOLO JURY TRIAL.  Preparing for a trial is A LOT of work.  My case was a car accident/personal injury case.  The defense (aka - my argument) was that the injuries the plaintiff was complaining about were not caused by the accident.  I spent countless hours pouring over medical records and deposition testimony, creating a timeline of injuries as she explained them and comparing them to the injuries as they were documented in her medical records. 

At some point, the plaintiff's attorney must have started to do the same thing...because less than a week before the trial was set to begin he called and said that he was preparing a settlement offer for our client.  Up to this point, we had offered $7,000 to settle, and they said they would not take less than $100,000.  Well, just three business days before the trial, we received their offer - $18,500.  We countered with $8,000 and they accepted.  So...I did all of my prep work for my first jury trial...and then settled.  It was very anticlimactic, but a very good learning experience.

After the case settled, I have continued to work crazy hours in an attempt to catch up on the rest of my cases!

NOW, on to the cupcakes!

During my busy time at work, I have had very little time to bake (and even less time to blog, duh!).  However, I did find time to make some margarita cupcakes! 

I found this recipe at the Cupcake Project, which is fast becoming my favorite baking blog.  The changes I made (which might not be changes because she doesn't really specify in her recipe) are basically just quality changes (I also didn't follow the vegan recipe...cause I am not vegan).  I am a tequila/margarita snob, so I used fresh squeezed lime juice.  I also used Milagro tequila (shown here on another night when Ian made homemade pizza and I made homemade mango margaritas!  YUM!).


Edit:  Picture of tequila on baking night -


I also used cute little candy lime/lemon/orange slices for my decorations, which I thought fit better with the margarita theme.

The biggest issue I had with this recipe was the frosting.  First, it refused to thicken.  On the first cupcake I frosted and tried to add the colorful rim to, the frosting dripped down the side of the cupcake, the rim completely came off, and the cupcake didn't even look frosted anymore.  I added more powdered sugar to the frosting and whisked it more...and then I stuck it in the fridge for a while, and eventually it was thick enough to stay on the cupcakes while I decorated them.  Then I quickly put the cupcakes in the fridge, where the frosting hardened.  It was a process, but it ended up working well! 

The second issue with the frosting is that I made WAY TOO MUCH.  I never intended to make a double batch of frosting.  But apparently doubling the cupcake recipe confused my brain, because I just automatically started doubling my ingredients for the frosting.  It wasn't until I started adding the powdered sugar that I even realized I was doing it! 

In the end, I thought these cupcakes were fine.  They weren't my favorite, but they were tasty. 

Other people, on the other hand, LOVED these cupcakes.  I had more people request the recipe/stop by my office to tell me how much they loved these cupcakes than I have ever had before...so they are definitely an office favorite!


Margarita Cupcakes - (makes 12, so I doubled this recipe)
1/4 cup fresh squeezed lime juice
1 1/2 tsp lime zest (about 1 lime)
1 cup milk
1/4 cup vegetable oil
2 tsp tequila
1/2 tsp vanilla extract
1 cup sugar
1 1/3 cup all purpose flour
1/4 teaspoon baking soda
1/2 teaspoon baking powder
1/2 teaspoon salt
  1. In a large bowl, mix together lime juice, lime zest, milk, oil, tequila, vanilla, and sugar.
  2. In a small bowl, mix together flour, baking soda, baking powder, and salt.
  3. Add the dry ingredients to the lime mixture and stir until just combined.
  4. Divide evenly among 12 cupcake liners.
  5. Bake at 350 F for 20-24 minutes, until a toothpick inserted in the middle of the cupcake comes out clean and the cupcakes spring back when lightly pressed.
Margarita Frosting Recipe - the Cupcake Project recommends cutting this recipe in half if you only make 12 cupcakes...I made 24 cupcakes and doubled the recipe...obviously I ended up with too much frosting.
1/4 Cup butter, melted
1 tbsp heavy whipping cream
3 tbsp fresh squeezed lime juice
1 tbsp tequila
2+ cups confectioners/powdered sugar
course colored sugar (and a little salt) for the "rims"
Candy lime wedges for decorations
  1. Cream together butter, heavy whipping cream, lime juice, tequila, and confectioners' sugar.
  2. Add in more sugar as needed to make the frosting smooth and spreadable.
  3. Spread the frosting on the cupcakes.
  4. Combine the colored sugar and salt in a small bowl.
  5. Roll the edge of each cupcake in the sugar/salt mixture.
  6. Top with the candy lime wedges.

Tuesday, August 23, 2011

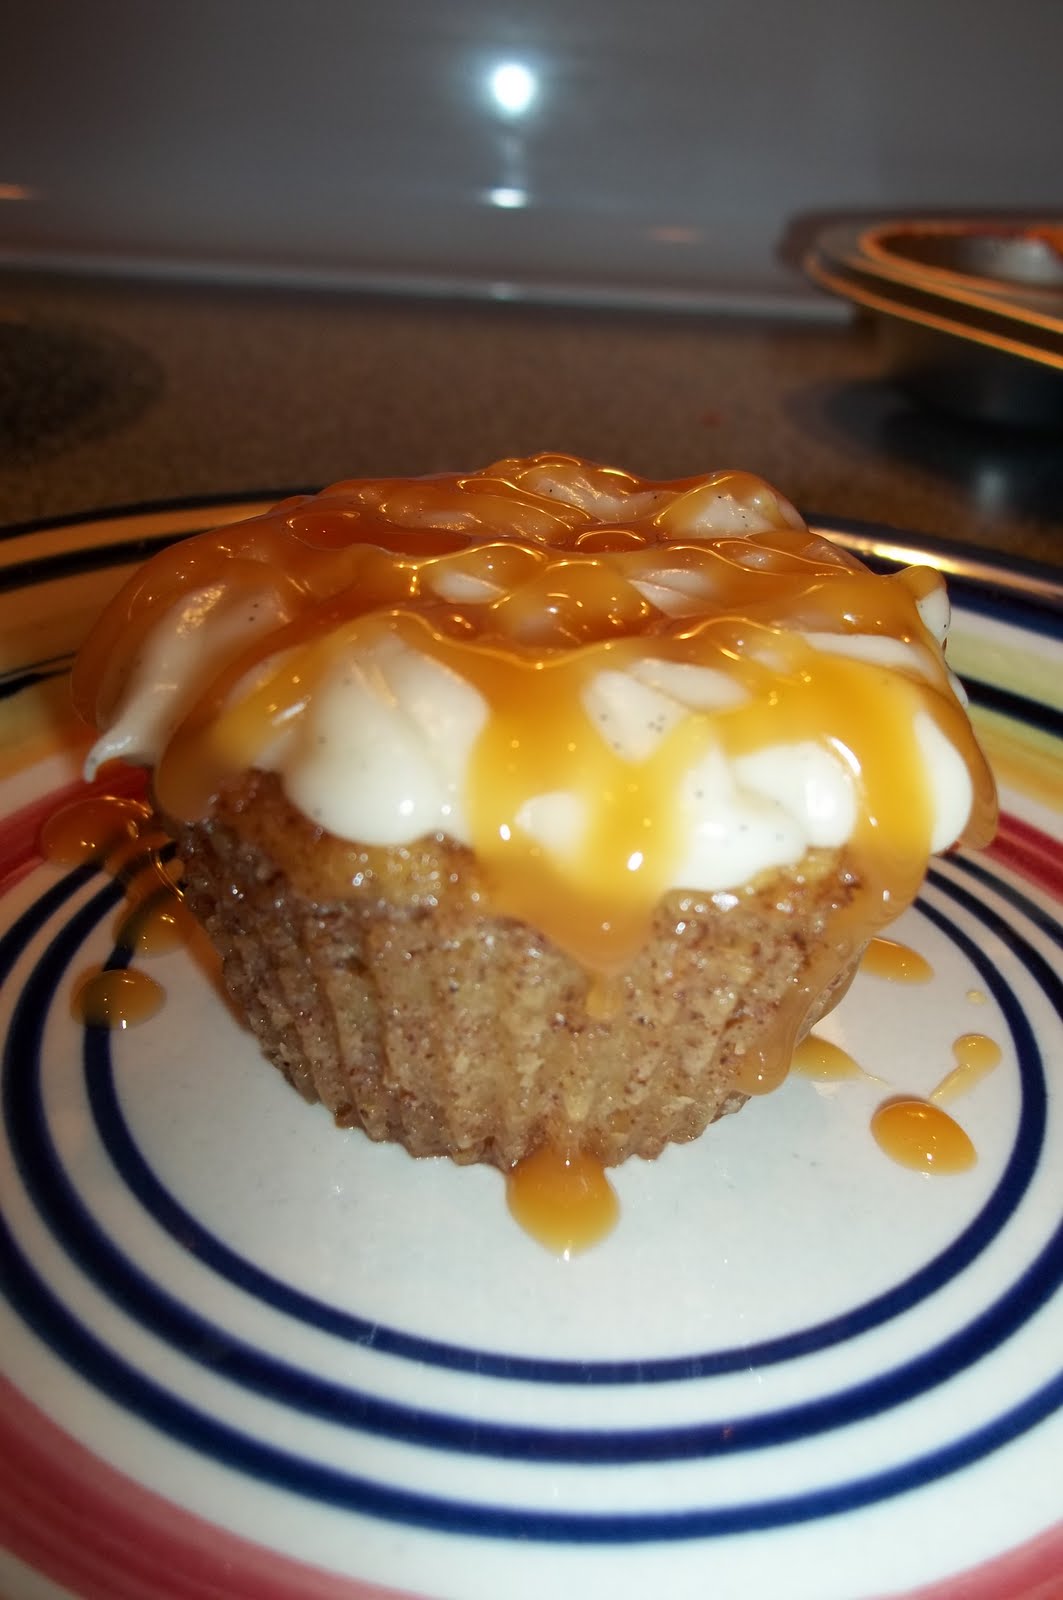
Caramel Apple Cupcakes with Vanilla Bean Frosting

This is officially my first blog post about a cupcake that was made AFTER I decided to start a blog, which doesn't really mean anything to you except MORE PICTURES (which Ian makes fun of...but I don't know anyone who would want to read a blog about baking and wouldn't want to see pictures.  Do you???). 

So, I found the recipe for Caramel Apple Cupcake with Vanilla Bean Frosting on the Cupcake Wars website during my first scan through their recipes and I was very excited to try them.  In my excitemed state I wanted to share my new recipe finds, so I sent links to the three cupcake recipes I really wanted to try to Megan (one of my best friends who is from Kansas, but now works in Iowa).  She looked at the recipes and said that they looked interesting, but that she wasn't really interested in eating any of them because she doesn't really care for sweets.  Well, she wasn't interested in eating any of them except the caramel apple cupcake.   

Megan came to visit me (and her family) a couple of weeks later, and I decided that between work and our dinner reservations, I would make these cupcakes so she could try one! 

The cupcakes themselves were very simple to make; however, there were a few interesting aspects.  First, the recipe calls for four apples, peeled, cored, and cut.  I don't really like using knives (I'm fairly certain I am going to cut off my finger...and my skittishness while using them probably makes that more likely...which makes me more skittish...and around and around we go).  So, to peel the apples, I used a potato peeler, which worked rather nicely.


Next, it was time to cut the apples.  Many of the people who commented on the original recipe suggested that shredding the apples worked better in the recipe.  Again, I don't like knives, so anything that keeps a knife out of my hand is a good option.  However, I've also never shredded fruit...so I was very uncertain how that would work.  Turns out, it works rather well!


I have to admit, that after I had mixed all of my ingredients, but before I added my apples to the batter, I was really concerned.  This batter was unlike any other that I have made.  Usually the batter is semi-runny...this time, it was just a clump of ingredients.  But when I added the apples, like magic, the batter actually looked like batter (ok, it isn't magic...it is the fact that apples have juice)!  I still thought this batter looked funny with strings of apple in it, so I took a picture to share with you!


Yummy, right?

I also had the opportunity to use some fun ingredients in this recipe.  First, I have a sister-in-law, Amanda, who is very crafty.  On one of my last trips home, Amanda told me that she had made her own vanilla extract!  I was thoroughly impressed, and she gave me some to take home with me!  This isn't a very good picture...but here it is!


You can't see them in this picture, but there are actually vanilla beans in that jar.  Apparently all you do is put vanilla beans in a jar and cover them with alcohol (vodka or bourbon will work) and then let everything sit for a while!  I LOVE my vanilla!

The second fun ingredient is also vanilla.  This vanilla is vanilla bean paste, and it was in the frosting.  I purchased mine at William Sonoma.  The difference between the vanilla bean paste and the vanilla extract is that in vanilla bean paste, vanilla beans are actually chopped up in the paste.  Vanilla bean paste is much thicker than vanilla extract, but it is still a liquid.  Apparently you can substitute it anytime your recipe calls for vanilla extract.  Here is a picture of the bottle that I purchased...and here is a picture of what the actual paste looks like (along with a better description of what it is and how/when to use it!).


The last fun part of the caramel apple cupcakes baking experiment was finding new baking cups and trying them out.  Obviously, for the past couple of weeks (a month, maybe?), I have been baking lots of cupcakes.  One thing that always drives me crazy about cupcakes are the little cupcake liners.  First off, I'm cheap and I don't really want to buy expensive liners.  However, the cheap liners are...well...cheap.  They are very thin, they pull away from the cake, and they leave the cupcakes looking like crap.  However, when I was at William Sonoma purchasing my vanilla bean paste, I found what I hoped would fix my issue with cupcake liners:  SILI-CUPS!


Sili-cups are silicone cupcake liners (baking cups) that are completely reusable.  Being a cheap person, this was one of those purchases that I justified by saying I would spend a little more now (about $25) to make the initial purchase, but I will use them so much that I will make up for it in the future!  Whether my justification pans out remains to be seen.  I purchased the sili-cups and tested them out with this recipe by lining one cupcake pan with normal paper liners, and a second cupcake pan with the sili-cups (notice how colorful the sili-cups are! I love them!).


In the end, I decided that I like the sili-cups better than regular cupcake liners (which is good...because I couldn't have returned them)!  Once the cupcakes are cool, you can just pop them out of the liners before decorating them (I had an irrational fear that the cupcakes would lose their cupcake form if I removed them from their liner...which is NOT true!).  They wash up really easily and are dishwasher safe.  They were a great purchase!

At the end of the day, I learned a couple of important baking lessons with this recipe.  First, don't frost cupcakes while they are still hot (or warm).  I had a little frosting melting problem.  This didn't effect the excellent taste of my cupcakes, but it did make them look a little bad.  Woops!

Second - don't soak cupcake pans.  They rust! 

I did finish my cupcakes in time to share them with Megan and her family (but the need to finish early contributed to the frosting fiasco!), and I can safely say that everyone who ate one of these cupcakes LOVED them.  So far, these have been my personal favorite!


Caramel Apple Cupcakes
2 cups granulated sugar
2 large eggs
1/2 cup unsalted butter, melted
2 teaspoons ground cinnamon
1 teaspoon baking soda
1 teaspoon baking powder
1 teaspoon salt
4 apples, cored, peeled, and chopped (recommended: 2 Granny Smith and 2 Fuji) (I shredded the apples)
Caramel Syrup (garnish)
  1. Preheat the oven to 350 degrees F.  Line two regular size cupcake pans with cupcake liners.
  2. In a large bowl using an electric mixer on low speed, combine the sugar, eggs, butter, and vanilla extract until blended.  In a separate large bowl, combine the flour, cinnamon, baking soda, baking powder, and salt.  Add the flour mixture to the butter mixture, mixing on low until blended.  Stir in the apples.
  3. Fill the cupcake liners 3/4 full with batter and bake until the cupcakes spring back when touched with your finger (15 to 20 minutes).  Let cool in the pan for a few minutes and then remove to a wire rack to cool completely (the cooling is important...)
Vanilla Bean Cream Cheese Frosting
1 cup unsalted butter, room temperature
1 8-oz bar cream cheese, room temperature
1 tablespoon vanilla bean paste
4 cups powdered sugar
1/2 teaspoon salt
  1. In a large bowl using an electric mixer on low speed, beat the butter, cream cheese, and vanilla bean paste until smooth and thoroughly blended. 
  2. Slowly add the powdered sugar and salt. 
  3. Mix until smooth.
  4. (try not to eat all of the frosting!)
  5. Pipe or spread the frosting onto your COOLED cupcakes and then garnish with Caramel Syrup!

Tuesday, August 16, 2011

My First Year as a Baby Lawyer

Today is my first anniversary at the Firm and yesterday three new associates started, so I am now no longer the newest attorney here!  My life has changed significantly in this past year, and I have to say that every single day I feel so lucky to have found a job that I absolutely love!  So, my highlights from my first year as a baby lawyer are:
  1. Participating in my first jury trial!  I never expected that a mere 4 months after I started here a partner would ask me to participate in a jury trial.  During jury selection, the partner  told the jury that I had only recently passed the bar, and the entire group of potential jurors gave me an ovation (which is rather odd in a courtroom).  I gave my very first opening statement to a jury of 12, and it was exhilarating and terrifying all at the same time!  I also directed a witness.  All in all, the experience was WONDERFUL and only reaffirmed my desire to be a trial attorney.  The best part, however, was listening as the verdict was read and realizing that we had won!
  2. Having free time!  All throughout college and law school, if I ever complained about life being hectic, a common retort to my complaints was, "Just wait until you get into the real world!"  I am happy to report that I am now in "the real world" (although I fail to understand how law school is somehow not the real world) and I have more free time than I know what to do with!  It is AMAZING!  Obviously there are times when I have to put in late hours at the office or come in early.  I work the occasional weekend.  But on the whole, I have more me time than I remember having at any other point in my life!  I read FOR FUN!  I watch TV, go to movies, hang out with friends, BAKE, and do all other sorts of fun stuff.  Free time is definitely a highlight!
  3. Taking my first deposition!  Just a couple of weeks ago I took my very first deposition.  I was very nervous going in, but by the end of the afternoon I was relaxed and comfortable with what I was doing...and I left with a story to tell.  My first deposition was such a good experience I will be devoting an entire post to it once I get the transcript! 
  4. The people I work with.  Personally, I think that coworkers can make or break a job.  I LOVE my coworkers at the Firm!  We have attorneys' nights out where we eat greasy hamburgers and drink beer, we play poker, we host baby showers, we have happy hours about once a month, we play practical jokes, and we produce good work.  I love the fun atmosphere combined with an opportunity to learn from some very intelligent and highly respected attorneys!
Of course, no job is amazing all of the time, and there have definitely been some rough spots as well.  For me, the worst part of this year was when the associate I started with decided to take a job offer in a different state to be near his son.  Obviously, I was very happy for him to have the opportunity to spend more time with his child, and it was definitely the right choice for him, but I was sad to see such a good friend and confidant leave! 

Another difficult part of this job is being so far away from my family and other loved ones!  In my perfect world, everyone I love would move here...obviously, that isn't happening anytime soon (other people apparently don't have the same affection for Kansas as I do!)!

So, in the end, I am happy to report that having completed my very first year as a baby lawyer, I am still convinced that I made the right career choice for me and I still go to work every morning excited for my job (well, not every morning...I'm not really a morning person...)!  In honor of this milestone, I finally brought my diploma to work and hung it on my wall, thus making it much more difficult for me to make a fast and unnoticed escape!  So, here's hoping that year two goes just as well (seriously, I still have a lot of student loans...)!

Friday, August 12, 2011

Chocolate Stout Cupcakes and Irish Cream Frosting

If you have actually been reading all of my blog posts, chances are good that by now you are thinking to yourself that this blog may be misnamed.  Maybe you think that I have lead you astray.  Well fear not, I finally bring you a cupcake filled with booze!

Over the summer my law firm brings in summer associates to work for ten weeks, and at the end of ten weeks we decide whether we want to hire them to work here full time after they graduate from law school.  Because I am the newest associate at the firm (until Monday!) and because I tend to enjoy the social events throughout the summer (I really like places where there is free food and alcohol), I spent a lot of time with the summer associates this summer.  I also spent a lot of time with their significant others.  During one of the many social events, my cupcake baking came up and of the significant others said, "Oh, you must love Cupcake Wars."  I had no idea what she was talking about.  It turns out that there is a show on the food network that is all about baking cupcakes...who knew?! 

Personally, I prefer to watch crime dramas and the occasional reality TV show featuring trashy women (hello The Bachelor, I'm lookin' at you!).  But, I figured I should at least check out the Cupcake Wars website to see what it had to offer.  It was AWESOME and I immediately printed off three recipes that I knew I wanted to make.  I let Ian make the ultimate decision about which cupcake to try first, and he chose the Chocolate Stout Cupcakes with Irish Cream Frosting.

These cupcakes were a little more complicated to make.  For instance, you make the batter in a saucepan, which meant no using my/Ian's Kitchen Aid.  However, they were still rather simple if you follow the directions. 

I did make one modification to the recipe.  The recipe recommends that you use Guiness as your Irish stout.  However, you are using it to make chocolate cupcakes, and I KNOW there are more chocolaty Irish stouts available.  So, I went to my local liquor store and requested to be pointed in the direction of the stout with the best chocolaty flavor.  The very helpful gentleman told me that the best and most chocolaty stout that they carry is Rogue Chocolate Stout, which is what I used.  Now, the recipe calls for 1 1/2 cups of Irish stout...but the Rogue Chocolate Stout comes in 16 ounce bottles...so I had to drink the leftovers.  Personally, I am not a huge fan of stout on its own, but a good chocolate stout mixed with and equal amount of Lambic's (I prefer raspberry, but you could also use cherry, peach, or any of the other flavors) makes a delightful chocolaty/fruity drink!

Unfortunately, after the filled cupcake and the upside down cupcake, this cupcake had big shoes to fill, and it came up short.  Don't get me wrong, the cupcake itself tasted fine...but it was just fine.  It was a chocolate cupcake that took more effort to make than my other chocolate cupcakes but tasted just like a regular old chocolate cupcake. 

The frosting was the best part about this cupcake.  I always take all but two of my cupcakes to my office on the Monday morning after I bake because the people in my office will eat anything in about an hour at the most.  Sometimes after I leave the cupcakes in the cafeteria, I will stop by to see if anyone is actually eating them (they always are, but I have this illogical fear that no one is going to take them).  This time when I came back to check on the cupcake eating progress, I noticed that someone had taken the frosting off of one of the cupcakes, but left the cupcake in the container.  My guess is that they had already eaten one and just wanted more frosting...but I am really not sure what happened there!

In the end, these cupcakes were good, but the first two I made were better.  These ones were definitely better after I chilled them in the refrigerator overnight.

Oh, this was also the first time I ever attempted to decorate a cupcake with frosting out of a pastry bag.  I originally did this...


Ian promptly made fun of my inability to frost my cupcake and tried to teach me proper form...but all I ended up with was this:


Which I tend to think looks like a mound of dog poo.  So...obviously my frosting technique needs some work. 

Lesson learned about frosting made mostly from butter = it melts.  Especially if you frost your cupcakes, remove it from the cupcakes, frost them again, remove it again, etc.  Beware! 

The recipe is here,
but I will also write it below to make it easier! 

Chocolate Stout Cupcakes
1 1/2 cups Irish stout (I recommend Rogue Chocolate Stout)
4 ounces unsalted butter
3/4 cups Dutch-processed cocoa powder
2 cups dark brown sugar
3/4 cups sour cream
2 eggs
1 teaspoon vanilla extract
2 cups all-purpose flour
2 1/2 teaspoons baking soda
  1. Preheat the oven to 325 degrees Fahrenheit.  Line a cupcake pan with 24 regular-size cupcake liners.
  2. Place the stout and butter in a medium-size saucepan and whisk together on medium heat until the butter is melted.  Remove from the heat.
  3. Sift the cocoa powder into a medium-size bowl and add the sugar.  Slowly whisk into the stout mixture. 
  4. In a small bowl, combine the sour cream, eggs, and vanilla and lightly whisk until smooth.  Add this mixture to the saucepan and whisk thoroughly (it may appear lumpy). 
  5. Sift the flour and baking soda together in another small bowl and then add it to the saucepan, mixing a final time until the color is even.
  6. Fill the cupcake liners 3/4 full with the batter and bake until the cake spring back after touching, about 27 minutes.  Cool the cupcakes in their pan for five minutes before transferring to a cooling rack.
Irish Liquor Frosting
1 pound unsalted butter
4 tablespoons Irish cream liquor (Baileys)
4 cups confectioners' sugar (if you are like me and don't know...this is powdered sugar).
  1. Cream the butter in the bowl of an electric stand mixer until pale.  Turn the mixer on low speed and add the Baileys in a steady stream.  Slowly add the confectioners' sugar and continue beating until a creamy consistency is achieved.
  2. Pipe the frosting onto cooled cupcakes using a large plain tip.  Dust with cocoa powder if preferred (I didn't do this).

Thursday, August 11, 2011

Pineapple Upside Down Cupcakes

I'm fairly certain I have never had pineapple upside down cake in my life, so I'm not really sure why I couldn't stop thinking about making pineapple upside down cupcakes for about two weeks straight.  Seriously, it made no sense.  I wasn't even sure what they would taste like...but I KNEW I wanted to eat them!  

I found a recipe for pineapple upside down cake in my Better Homes and Gardens cookbook and thought that it would be perfect.  I also knew that I wanted to use a glaze recipe from the same cookbook for the frosting. 

The most complicated thing about this recipe was flipping the cupcakes over so that the butter/brown sugar/pineapple combination could seep into the cake.  I have wire racks for cooling baked goods, but I didn't want to cool the cupcakes upside down on a wire rack.  I didn't want the imprints from the rack on my beautiful cupcakes.

Instead, I turned the cupcakes upside down on a flat cookie sheet.  This was also problematic.  The cake from the top of the cupcakes got stuck to the cookie sheet.  The lesson I took away from this was that I should have lined my pans with waxed paper.  I didn't really mind the missing cake on the top of the cupcakes, though...it just provided the perfect little divot to fill with frosting! 

Oh, another lesson I learned from this recipe is that the butter/brown sugar/pineapple combination is HOT when you take the cupcakes out of the oven.  As I was pulling one of the cupcakes out of its pan, a little of the melted mixture got onto my finger...and I promptly dropped the cupcake on the floor.

I was really happy with the way these cupcakes tasted, but I have to admit that I wasn't prepared for how they ended up looking.  You see, once the melted mixture seeps into the cooked cake, there is an empty space at the bottom of the cupcake liner for the cake to sink down into.  I didn't really like the sinking cupcakes.  However, they were delicious...so it wasn't THAT big of a deal! 


Pineapple Upside Down Cupcakes
2 tablespoons butter
1/4 cup brown sugar
1 tablespoon water
1 8-ounce can pineapple chunks
1 1/2 cups all-purpose flour
2/3 cup granulated sugar
2 teaspoons baking powder
2/3 cup milk
1/4 cup butter, softened
1 egg
1 teaspoon vanilla
  1. Preheat the oven to 350 degrees Fahrenheit.  Place to 2 tablespoons butter in a large saucepan and put the pan in the oven until the butter melts.  Remove from the oven and stir in brown sugar and water.
  2. Put liners in a cupcake pan (unless you make a double batch...then you should use two cupcake pans and make 24 cupcakes).
  3. Spoon equal amounts of the butter and brown sugar mixture into the bottom of each cupcake liners and then arrange pineapple chunks in the brown sugar/butter mixture (I used 4 chunks per liner).
  4. In a medium mixing bowl stir together flour, granulated sugar,and baking powder.  Add milk, 1/4 cup butter, the egg, and vanilla.  Beat with an electric mixer on low speed until combined.  Beat on medium speed 1 minute.  Spoon batter into the cupcake liners, filling each liner about 3/4 full.
  5. Bake 25-30 minutes or until wooden toothpick inserted in center of a cupcake comes out clean. 
  6. Cool in pan for five minutes then remove cupcakes from your pan and flip them onto a cookie sheet lined with waxed paper to finish cooling.
Powdered Sugar Icing (I call this glaze)
1 cup powdered sugar
1/4 teaspoon vanilla
1 tablespoon milk 
  1. In a small bowl combine powdered sugar, vanilla, and 1 tablespoon milk.  Stir in additional milk, 1 tablespoon at a time, until icing reaches drizzling consistency (I'm fairly certain I only made one recipe of the icing for 24 cupcakes).
  2. After your cupcakes have cooled, flip them over so they are right-side up again and drizzle them with icing.  I topped each cupcake with a pineapple chunk!  

Monday, August 8, 2011

Epic Burrito

At the end of June, Ian and I took a much needed vacation...back to Iowa (I know, it is rather exotic).  We were in Iowa to visit two of our best friends, Pete and Olivia, who moved to Washington about a year and a half earlier, and this was to be the first time we had seen them since their move.  It was also the first time we met their adorable baby.

Over the course of the week we visited our favorite watering holes from our previous lives as young and irresponsible adults.  It was a fantastic week full of shopping, games, and martinis...and flower headbands...


I did zero baking on this trip.  In fact, no one did any baking on this trip (that I am aware of).  What we did do was participate in an epic mealtime.  I don't really understand epic mealtime.  I think its a guy thing.  What I do know is that prior to heading to Iowa, Ian informed me that at some point during this trip we were going to eat possibly the most fattening and bacon filled meal that has ever existed.

We were making an Epic Burrito.  I use the word "we" loosely, because I did zero cooking of the Epic Burrito.  

Ian and Pete came up with an Epic Burrito plan of action.  I can't really tell you what it was.  I can tell you that they made a burrito shell out of a bacon weave.  The burrito was filled with more bacon (seriously), chorizo, green pork, hamburger, beans, and rice.  Then we smothered it.  In homemade cheese dip.  The cheese dip also contained all of our leftover meat.  This was the type of meal you are almost certain is going to kill you as you eat it.  Amazingly, we all survived!  Here is a picture of the burrito pre-cheese dip smothering!  I know it looks really scary, but it was AMAZING (for one time only...seriously, you could NOT eat this on a regular basis)!